Scaffold with Bunup
Spin up a modern, ready-to-publish TypeScript or React component library (or a basic starter) in ~10 seconds.
- 🚀 Instant Setup: Scaffold, code, edit README, and publish with a single command - with nothing to rename or configure
- 📦 Modern: ESM by default, TypeScript declarations, and optional monorepo support
- 🛠️ DX First: Integrated Bun-powered testing, Biome linting and formatting that just works out of the box
- 🚢 Publishing: One-command releases with automatic semantic versioning, GitHub tags, and detailed release notes
- ⚡️ Mind-Blowing Speed: Build times so fast they feel instantaneous - a library building experience you've never experienced before
- ✨ Best Practices: Follows industry standards and modern development conventions out of the box
Getting Started
You can create a new project by using:
bunx @bunup/cli@latest createYou will be greeted with a few simple questions and that's it! You can now start coding.
You'll choose between two variants:
- Minimal: Minimal setup, perfect for building your own setup
- Full: Complete modern library setup, just focus on code and publish
If you selected minimal, you can skip the next sections which is for those who selected full to learn more about the commands and how to release your package. If you selected minimal, you set up these things yourself.
Setup for Releases
NPM now requires trusted publishing for automated CI releases, tokens are no longer supported. Your scaffolded project is pre-configured, but needs a one-time setup. After that, simply run bun run release for all future releases.
Setup Steps
Initial Publish:
- Monorepo: Navigate to your first package (
cd packages/my-first-package) and runbun publish --access public. Repeat for each new package. - Single Package: Run
bun publish --access publicfrom the root directory.
- Monorepo: Navigate to your first package (
Configure Trusted Publishing:
- Go to your package's NPM page → Settings tab
- Select "GitHub Actions" as your publisher
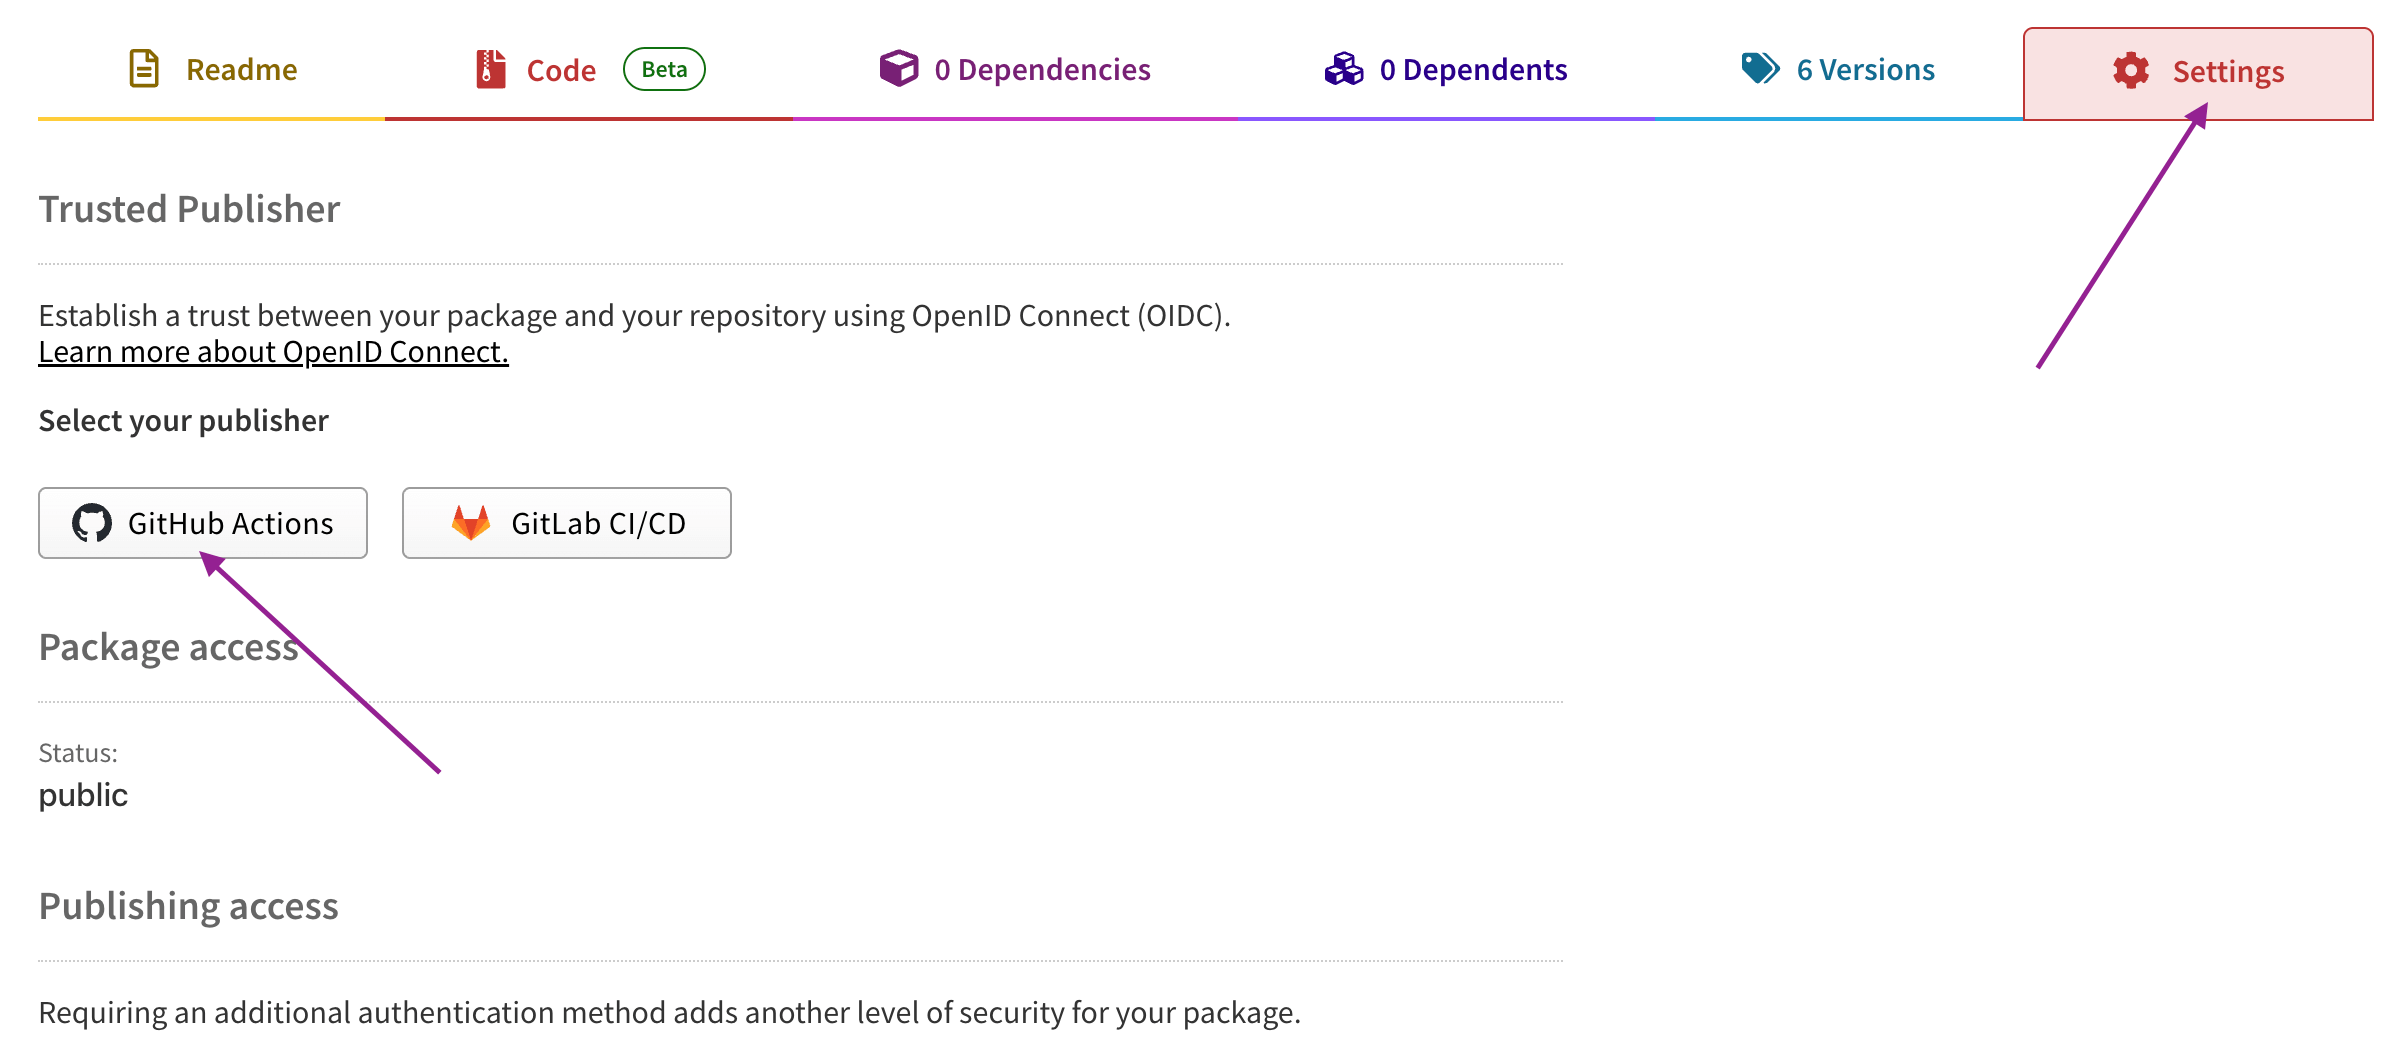
- Fill in the required fields:
- Organization or User: Your GitHub username or organization name
- Repository: Your repository name
- Workflow filename: Just the filename (e.g.,
release.yml, not the full path)- For scaffolded projects using Bunup, use
release.yml(since it's located at.github/workflows/release.yml)
- For scaffolded projects using Bunup, use
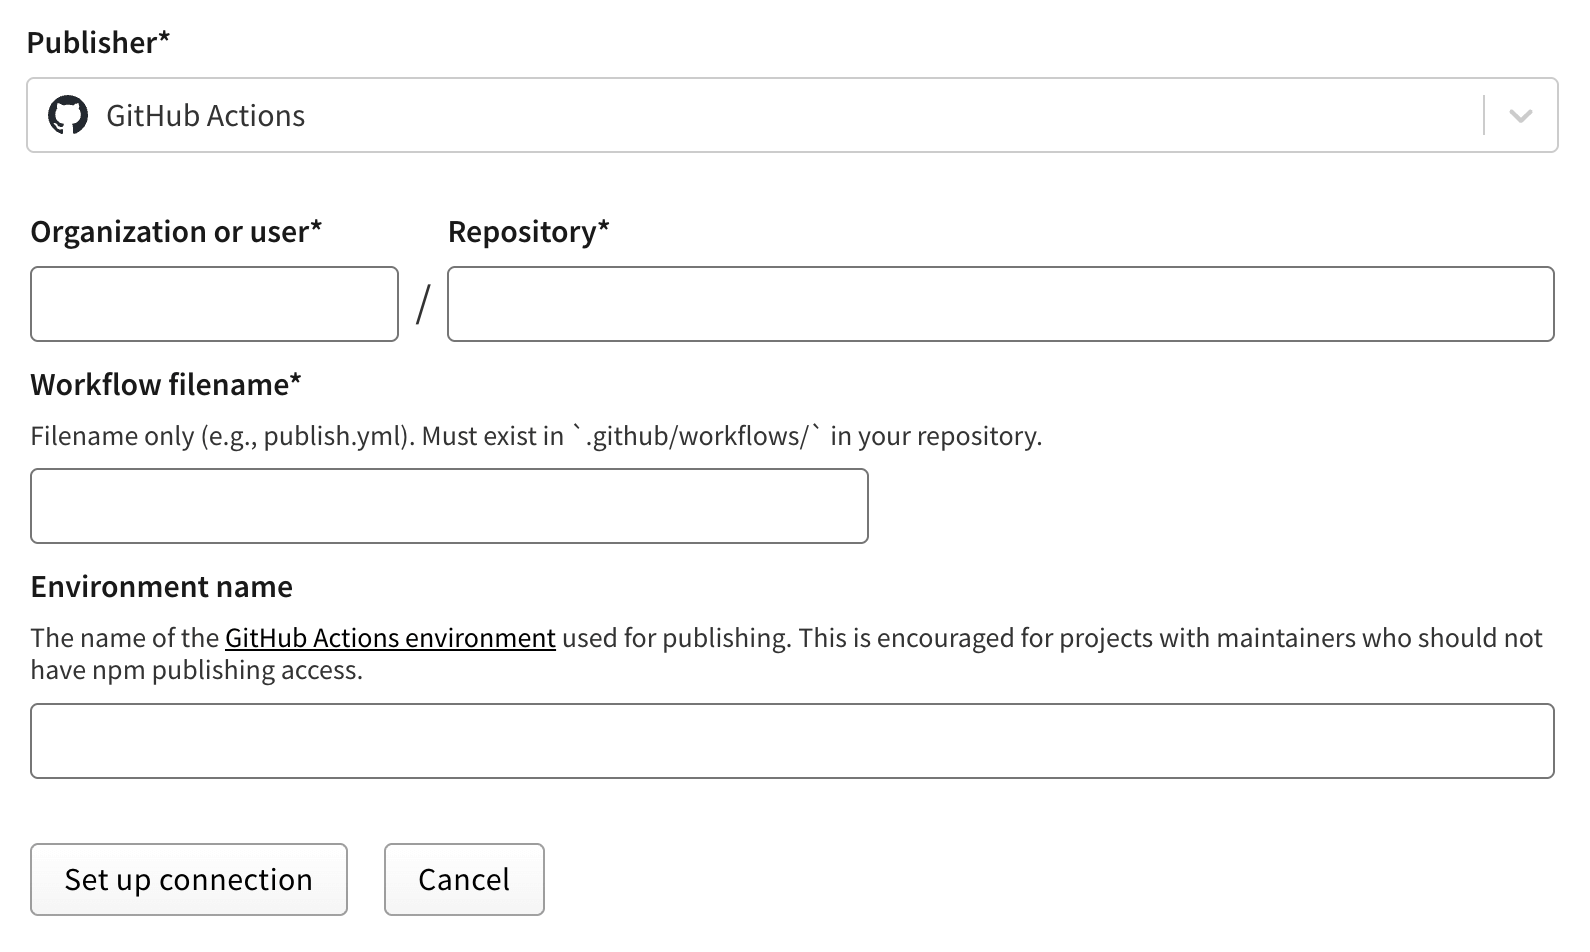
- Click "Set up connection"
You're Done!
- Ensure your repository exists on GitHub and matches the details provided
- Run
bun run releaseto publish
Development Workflow
After completing the setup, here's how to use your project:
bun run dev        # Start development mode
bun run test       # Run test suite
bun run lint       # Check code style and find problems
bun run lint:fix   # Fix linting and formatting issues automatically
bun run type-check # Type check TypeScript code
bun run build      # Build production bundle
Development Mode
The bun run dev command behaves differently based on your project type:
React Library: Launches a Bun + React preview app at http://localhost:3000 where you can see your components in action.
TypeScript Library: Starts watch mode that automatically rebuilds your library whenever you make changes.
CI/CD Workflows
The project comes with three GitHub Actions workflows:
- CI: Runs on pull requests and pushes to main, validating types, linting, and tests
- Release: Triggered by tags, builds and publishes the package to npm with provenance
- Issue Management: Automatically marks issues as stale after 30 days of inactivity
Releasing Your Package
When you're ready to release your package, simply run:
bun run releaseThis will:
- Prompt you for a new version (patch, minor, or major)
- Update package.json version
- Create a Git tag
- Push changes and tag to GitHub
The GitHub Actions workflow will automatically:
- Build the package
- Generate a GitHub release with changelog
- Publish to npm with provenance
Happy coding!